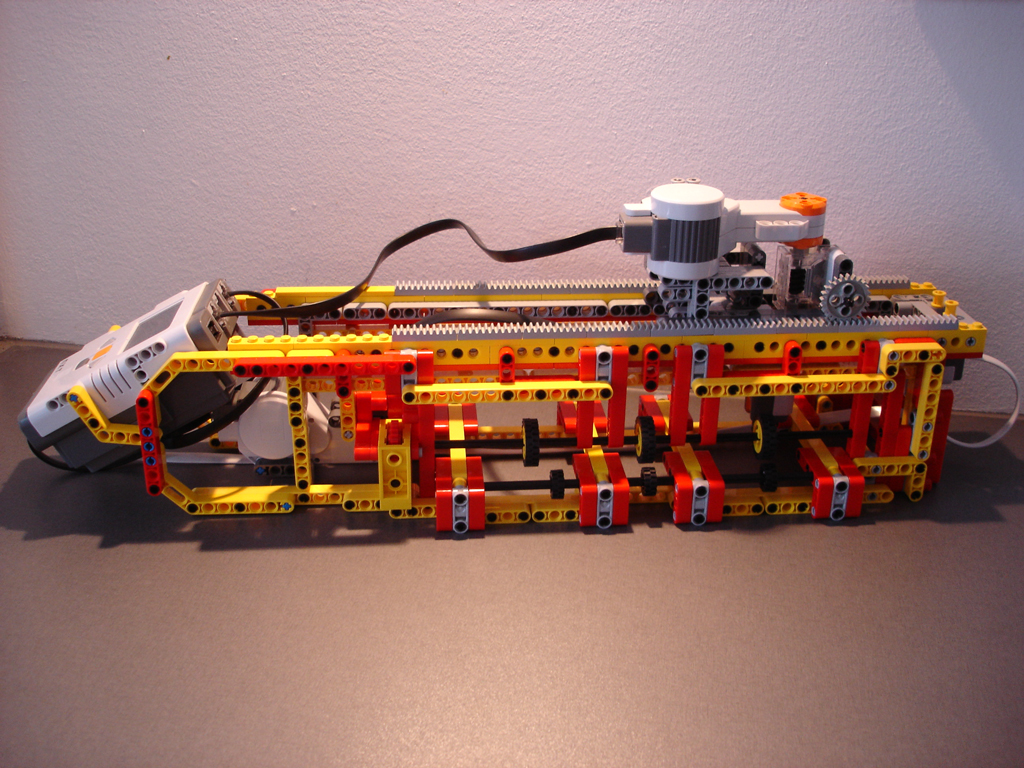
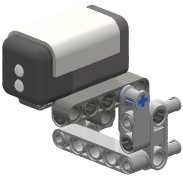
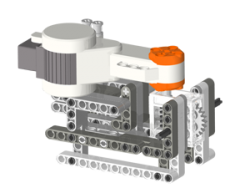
The NXT image scanner is a “stand alone” scanner that can scan and save images as a BMP-file in the NXT’s flash memory. Images can be saved in either 24-bit true color, 8-bit color or gray scale. Gray scale images are scanned using the light sensor whereas color images are scanned using the HiTechnic color sensor. The scanner has a small LCD menu that let’s you set the properties for the scan. The scanner is based on experience from my RCX scanner. Where the RCX scanner would take forever to scan even a small image the NXT scanner is much faster and the end result is to my own surprise improved. From the download section you will find building instructions and NXC program for building your own image scanner.
How it works
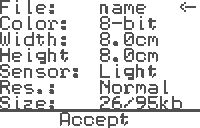
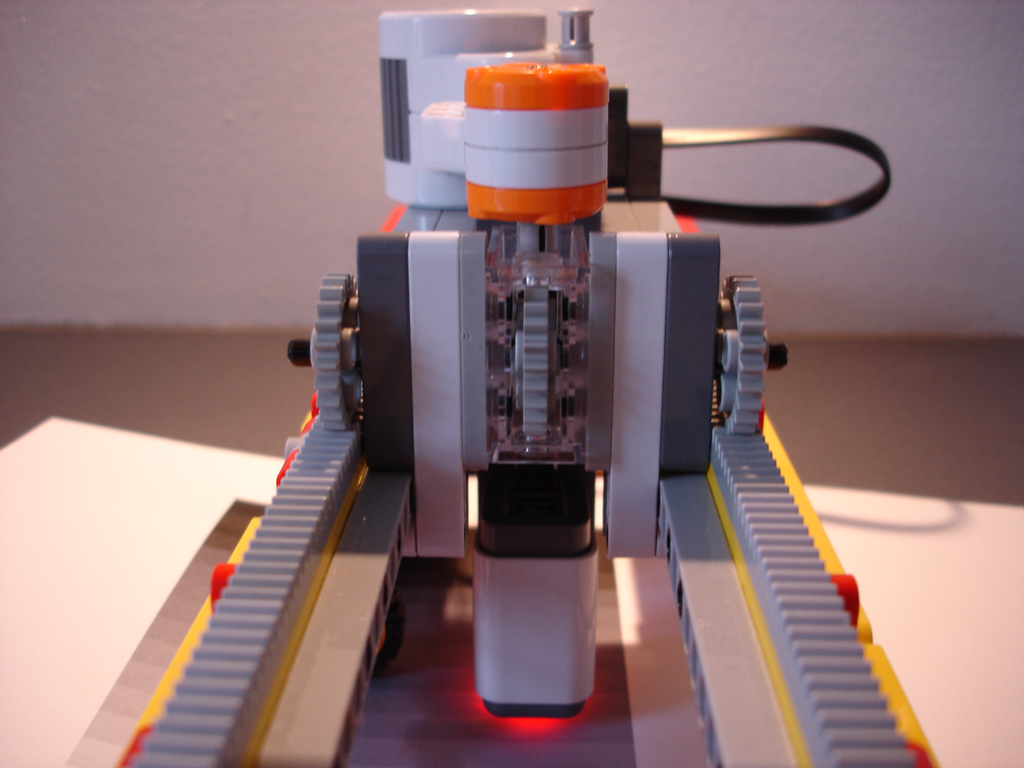
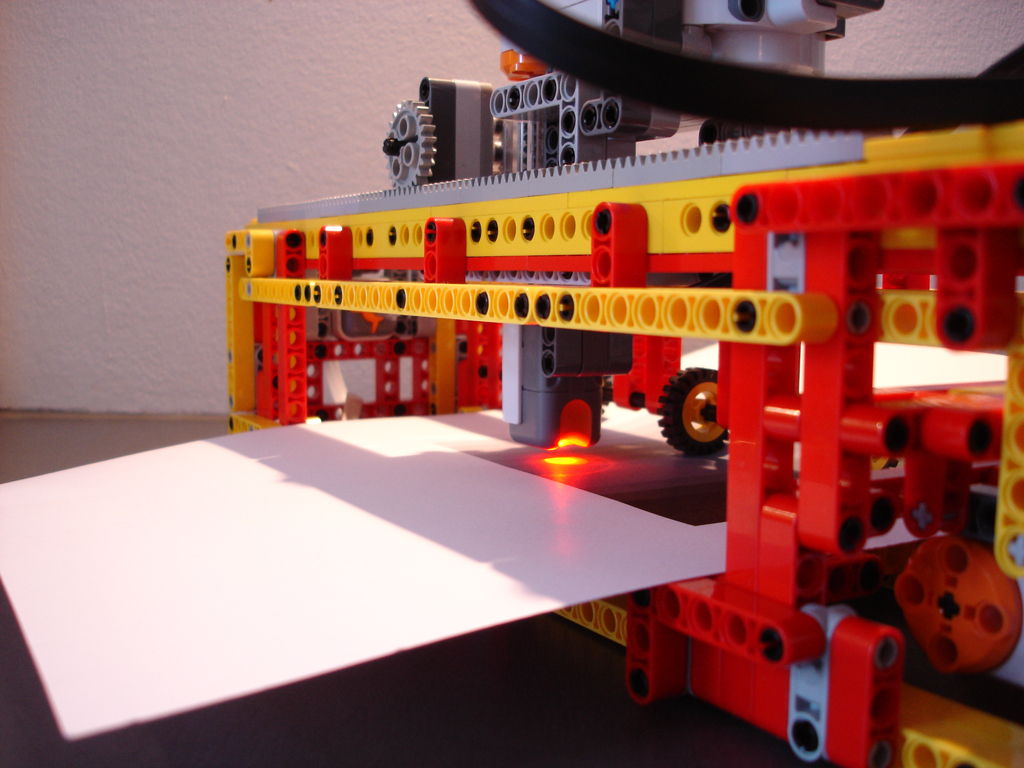
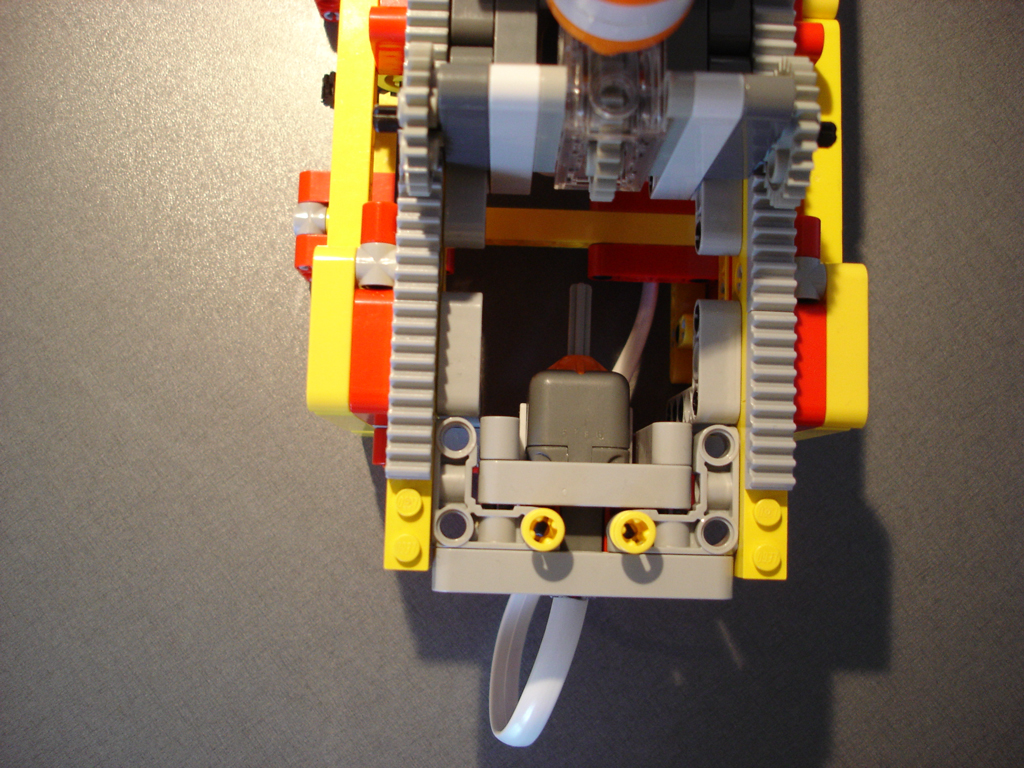
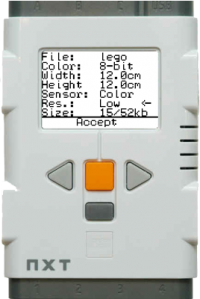
The image is created by moving the sensor over the image at a constant speed while recording the position and corresponding sensor values with a fixed sample rate. The recorded data is then processed to make up one line of the image. The line is saved to the BMP-file and the scanner will feed the paper so the next line can be scanned. This is repeated until the entire image has been scanned. The image processing time between each line depends on the color depth and of course the width of the image. Once the scanning is completed the image can be downloaded to the PC using Bricx Command Center or a similar tool. Before scanning a menu as illustrated on the animation to left is shown on the display.From the set-up menu it is possible to select between three different resolutions
- High – there will be a pixel for every 0.25 mm (100dpi)
- Normal – there will be a pixel for every 0.50 mm (50 dpi)
- Low – there will be a pixel every 1 mm (25 dpi)
A higher resolution will of course produce a larger file as more data is required. Since BMP images are uncompressed the high resolution can only be used to scan very small images due to limited flash memory. Saving an image in a compressed format as JPG or PNG has not been implemented.
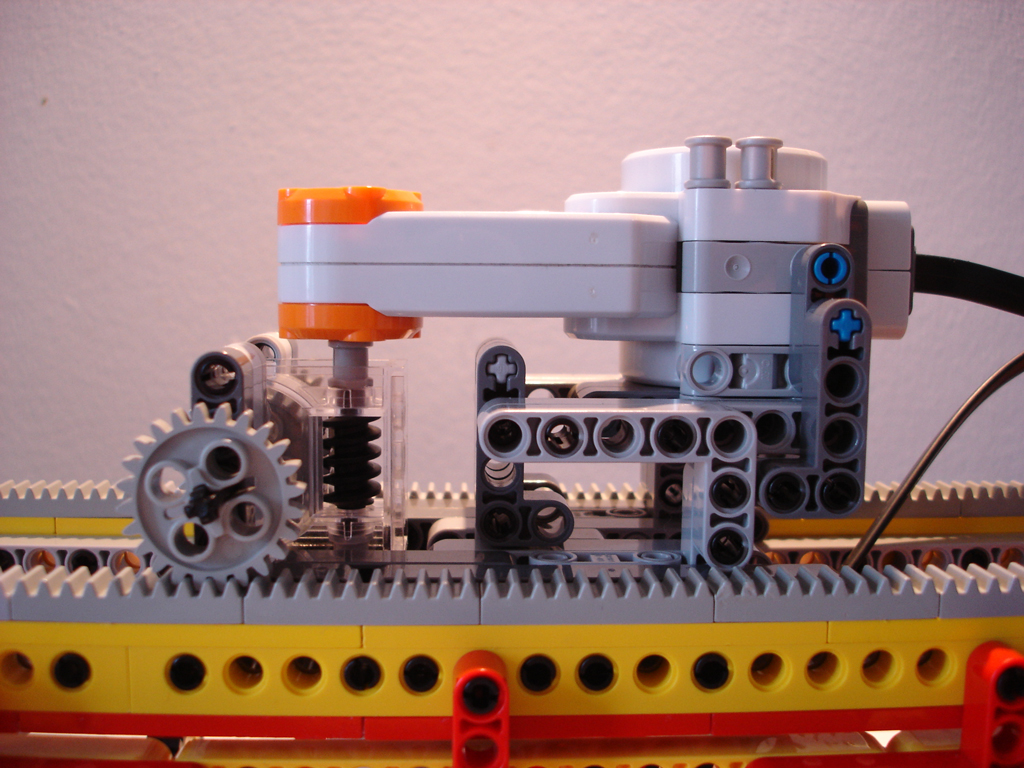
Gray scale scan
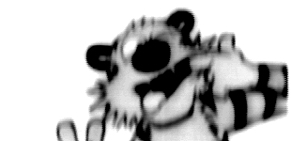
To scan an image in gray scale the standard light sensor is used in raw mode. In a gray scale color the RGB values are the same. This allows the BMP-file to be compressed to an 8-bit BMP-file where the gray color can have a value between 0 and 255. To convert the sensor readings into a value between 0 and 255 the following calculation is used:
![\[ \text{gray scale color} =\frac{255 \cdot(\text{sensor reading - black})}{\text{white - black}} \]](http://www.monobrick.dk/wp-content/ql-cache/quicklatex.com-b38c721924944e4f80ab7fef9d11ad22_l3.png "Rendered by QuickLaTeX.com")
Where Black is the sensor value that corresponds to the color black and white is the sensor value that corresponds to the color white. The light sensor is sensible to ambient light- but as long as you don’t flash a light near the light sensor the readings seems to be reliable.
Color scan
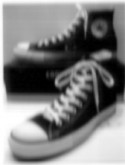
To scan an image in color the HiTecnic color sensor is used. The sensor allows you to read the raw RGB values. From the set-up menu it is possible to select between two different color depths. In the 24-bit mode the raw RGB values are stored in the BMP-file. In the 8-bit color mode the RGB values are converted using the netscape color cube. Instead of saving the raw RGB values a matching color in the color cube is found and an 8-bit reference to this color is saved in the BMP-file. This reduces the file size of the BMP-file significantly but only allows for 216 different colors. Because the color sensor is placed further from the paper than the light sensor it is more sensible to ambient light. This is also why a color scan is more blurred compared to the gray scale scan.When scanning a color spectrum with different resolution and color depths it turns out that the 8-bit color scan doesn’t perform that well – this can also be seen on the scanned LEGO logo.
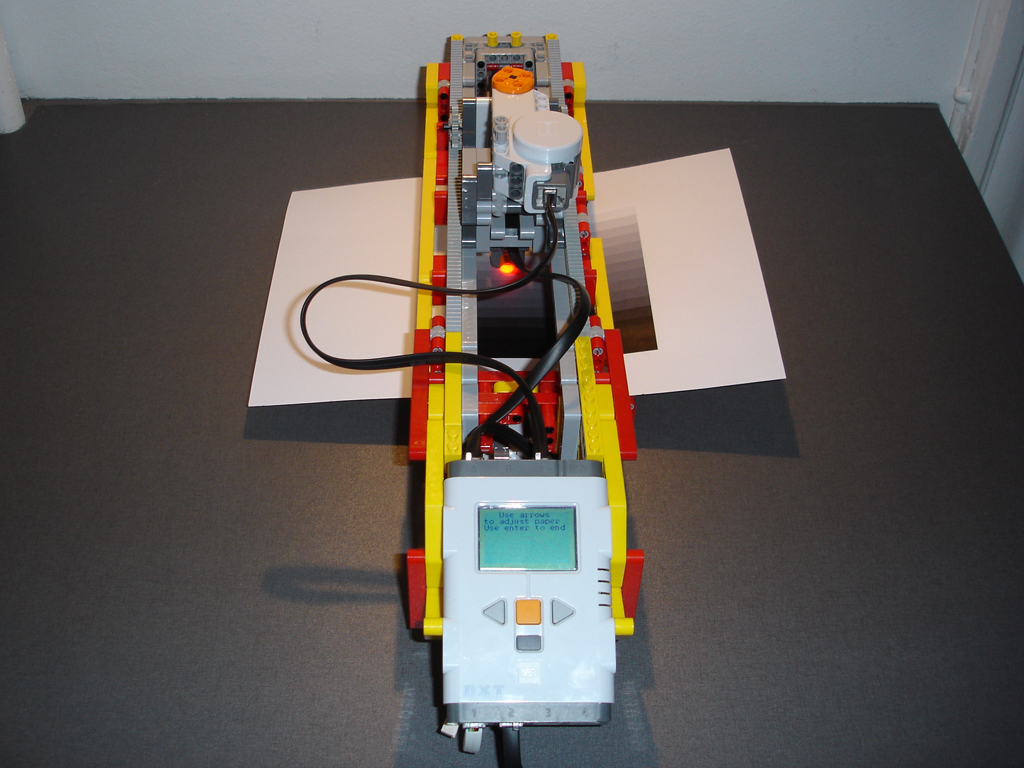
Building instructions
Below you will find building instructions for building your very own image scanner. Click on the links and a pop-up window with the instructions will appear. Alternatively you can download the Ldraw-files or get a quick run through by clicking on the video. It should be noticed that the sensor cable between the NXT and the touch sensor is longer that the standard retail cable. For instructions on how to make your own cables please visit philos homepage. The building instructions where made using LDraw, MLCad, LPub and POV-Ray.
Using the NXC program
To use the NXC program download the zip file using the download link. The program runs on the enhanced NBC/NXC firmware (version 1.06a). There are a few things to note when running the scanner program:
-
Delete all files before downloading the program to make room for images
-
Once the program has been loaded – use BricxCC to defrag the file system
-
When entering a file name simply double tap “enter” to end.
-
When entering a file name the character ‘<‘ will delete a letter in the file name
-
It is not possible to see BMP-files from the NXT menu – they must be downloaded to a PC using BrixcCC or another tool
-
Not all images are suited to be scanned – chose an image without many details to get the best result – a good idea is to scan a few lines before scanning the entire image
- If you scan a large image please be aware that it can take more than an hour to complete. So scanning an image using 6 AA batteries won’t be possible.


Jesper Madsen
Hinnerup College
Stadium All 1
Porst No: 8382
Phone: 20427437
I insist to buy your Lego Scanner
with Regards Jesper
How much 🙂
Jesper Madsen
Heimclal
Egebøksvej 26
Højbjers
Porst Nr: 8270
Telefon: 20427437
2000 Kr
med venlig hilsen Jesper
Jesper Madsen
Heimclal
Egebøksvej 26
Højbjers
Porst No: 8270
Phone: 20427437
2000 Dollars
with Regards Jesper