This guide descries how to establish a WiFi connection with the EV3 LEGO Mindstorms brick using the standard firmware. Before you can establish a connection you need a USB WiFi dongle that is supported by the firmware. Currently only one dongle is supported namely the NetGear WNA1100. Once you got your hands on one follow the description below to make the brick connect to a network.
Connecting the EV3 to a network
-
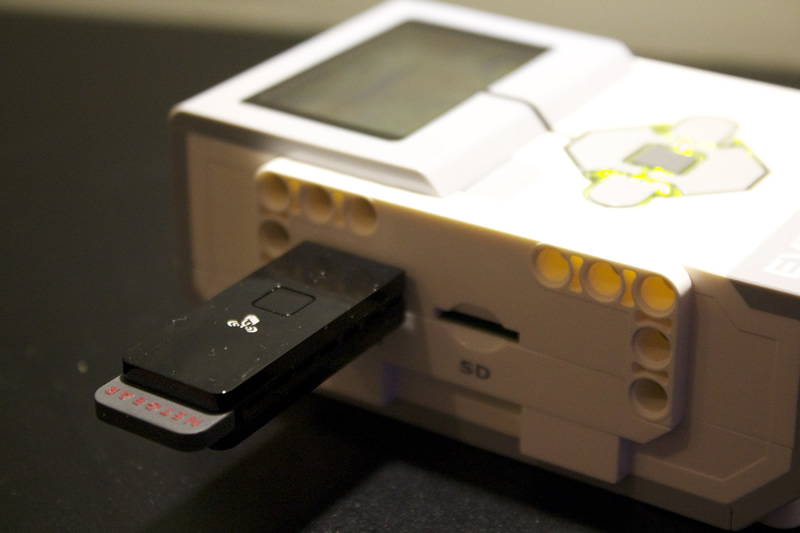
- Place the dongle in the USB port
-
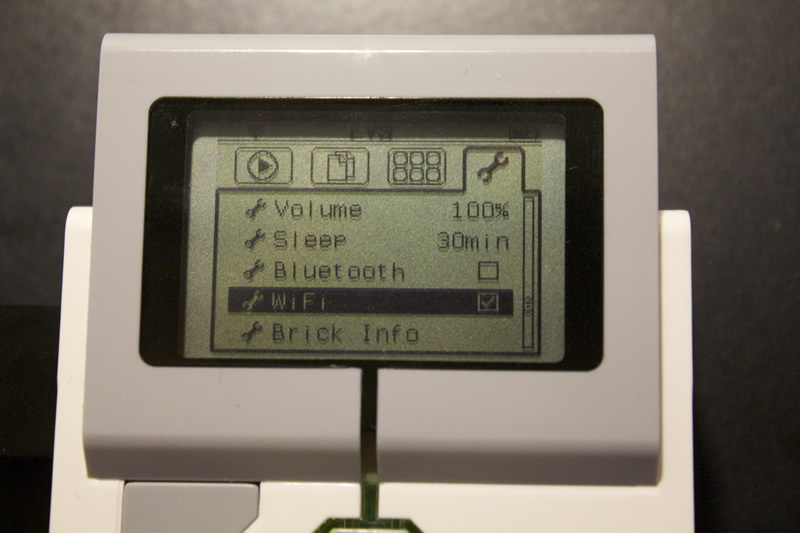
- Go to settings and select WiFi
-
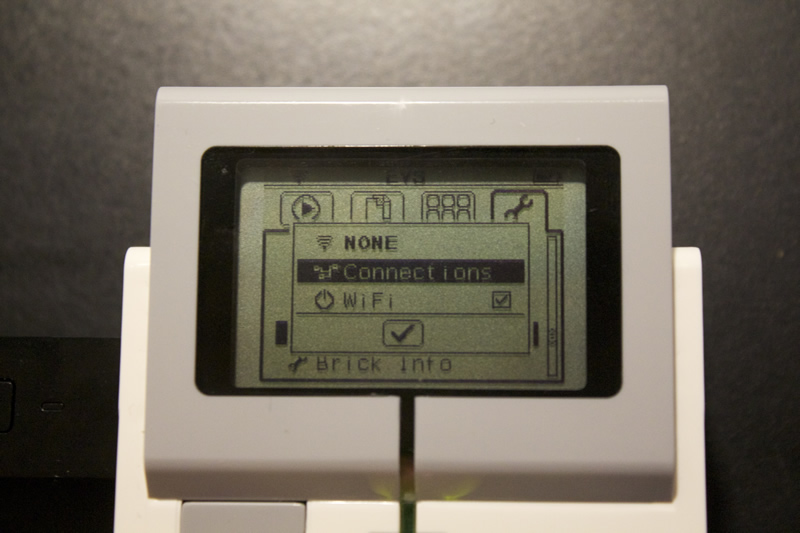
- Enable WiFi and select connections
-

- Select the Network to use
-
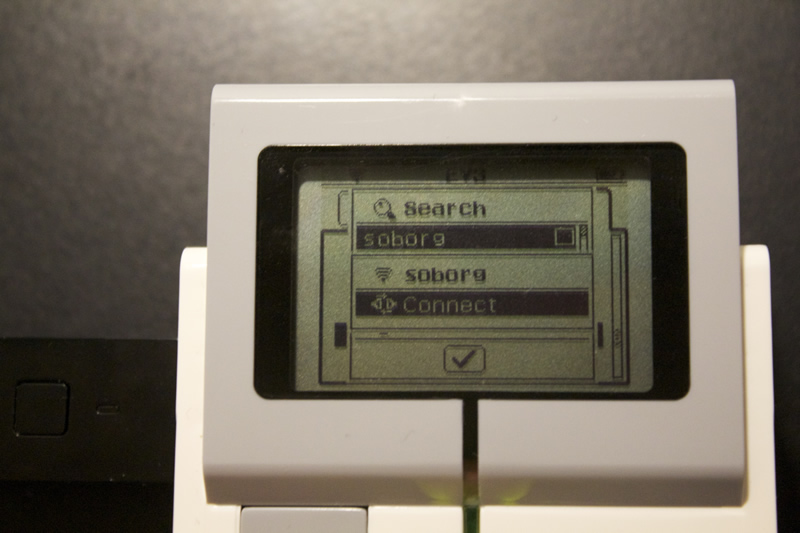
- Connect to the network
-
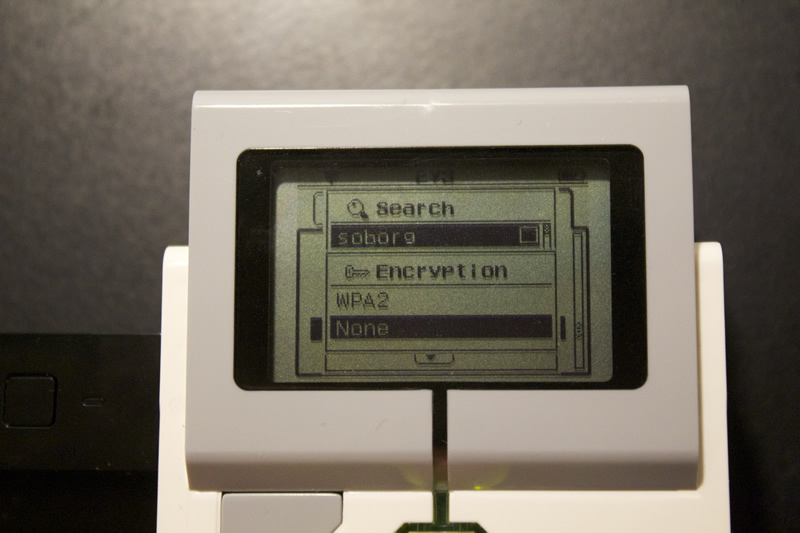
- Choose the encryption type
If everything works out right you should now be connected to a WiFi network. Now it is time to establish a connection as shown in the next step.
Establishing a TCP/IP connection with the EV3
Since connecting to the brick is not as strait forward as just opening a TCP/IP connection I have provided a Wireshark dump of a connection sequence. Overall the following steps are needed to unlock the EV3 brick and make it accept a TCP/IP connection.
- Listen for a UDP broadcast from the EV3 on port 3015
- Send a UDP message back to the EV3 to make it accept a TCP/IP connection
- Establish a TCP/IP connection on port 5555
- Send a unlock message to the EV3 over TCP/IP
Listening for UDP broadcast
Approximately every 10 seconds the EV3 will broadcast a UDP message on port 3015. The message is 67 bytes in size and contains the following text:
Serial-Number: 0016533f0c1e
Port: 5555
Name: EV3
Protocol: EV3
The serial number is needed when establishing a TCP/IP connection later on so remember it. Also the source port used for the UDP broadcast must also be the port used in the next step where we send a UDP message back to the brick to let it know that we wish to establish a TCP/IP connection.
Sending a UDP message back to the EV3
The contents of the data is irrelevant so just send a single byte. The important thing is that you send it to the source port that was used in the bricks broadcast message ( this is not port 3015). Once a message has been send the brick is ready to accept a TCP/IP connection.
Establish a TCP/IP connection
Connect to the brick using TCP/IP on port 5555 and use this connection to send the unlock message
Sending the unlock message
The unlock message has the following format:
GET /target?sn=0016533F0C1E VMTP1.0
Protocol: EV3
Where 0016533F0C1E is the serial number from the UDP broadcast. The brick should now reply with a 16 byte TCP/IP message with the following text:
Accept:EV340
indicating that the connection has been established. Now you should be able to send both system and direct commands to the brick over a WiFi connection.
Sending data over WiFi using the MonoBrick communication library
Below some sample code for the MonoBrick communication library is shown. Here a WiFi connection is used to control motor A.
using System;
using MonoBrick.EV3;
namespace Application
{
	public static class Program{
	  static void Main(string[] args)
      {

		try{
			var ev3 = new Brick<Sensor,Sensor,Sensor,Sensor>("WiFi");
			sbyte speed = 0;
			ev3.Connection.Open();
			ConsoleKeyInfo cki;
			Console.WriteLine("Press Q to quit");
			do
			{
				cki = Console.ReadKey(true); //press a key
				switch(cki.Key){
					case ConsoleKey.R:
						Console.WriteLine("Motor A reverse direction");
						ev3.MotorA.Reverse = !ev3.MotorA.Reverse;
					break;
					case ConsoleKey.UpArrow:
						if(speed < 100)
							speed = (sbyte)(speed + 10);
						Console.WriteLine("Motor A speed set to " + speed);
						ev3.MotorA.On(speed);
					break;
					case ConsoleKey.DownArrow:
						if(speed > -100)
							speed = (sbyte)(speed - 10);
						Console.WriteLine("Motor A speed set to " + speed);
						ev3.MotorA.On(speed);
					break;
					case ConsoleKey.S:
						Console.WriteLine("Motor A off");
						speed = 0;
						ev3.MotorA.Off();
					break;
					case ConsoleKey.B:
						Console.WriteLine("Motor A break");
						speed = 0;
						ev3.MotorA.Brake();
					break;
				}
			} while (cki.Key != ConsoleKey.Q);
		}
		catch(Exception e){
			Console.WriteLine("Error: " + e.Message);
			Console.WriteLine("Press any key to end...");
			Console.ReadKey();
	  	}
	  }
	}
}

Anders, I’m fantastically impressed by what you’ve done. I just got an EV3 for me and my son and we’re hoping to build a remote (i.e. over the web) control for our creations for our friends to try. Am I right in thinking MonoBrick will enable us to communicate with the EV3 Brick over wifi (assuming we get the dongle) and pass commands directly to the brick? If so, that’s truly great and can’t wait for the release.
Thanks,
Jason
Hi Jason
Yes with MonoBrick you can send commands to the brick over WiFi… Just wait a few days for the release – just need to do some final testing.
Anders
Hi! I just got my hands on an Ev3 myself and I am searching for a library to control it using Linux. Your project sounds great and so I just wanted to ask if you already know when your amazing work will be available for us?
Funny I just got a working USB connection on Linux as of this moment.. I will upload the release tonight or tomorrow. Thanks for stopping by.
Woah! That is awesome!
You’ve made my day! As soon as it is available I will dig into it and if it is ok for you blog about your work on my website (http://the-engine.at). It is in german. Thanks for your work!
That sound really great… I will let you know when it is ready. Thanks
Dear all,
how to put in in the wpa2 key the dash ‘-‘. Ev3 don’t accept these.
br. Mind
I have not had the need for this… so I don’t know if it is possible
In case you haven’t figured it out yet, you can establish the Wifi connection including the password via the Mindstorm software.
Did enable the dash. Changing my password on all the wifi devices would be super hassle.
Sorry, meant to say “Did anyone enable the dash symbol on the ev3?
Do you know if there is a way to run a program on the EV3 from the iPad?
Please post questions in the forum
There is an app for control called ev3 commander, doesn’t go very far though. :/
Does this workflow works with wired network connection (use usb ethernet adaptor to connect EV3 into the network)?
Hi
Again please post questions in the forum….
WiFi connection – how to/ using OSX Mavericks
1. plug in (Netgear) WiFi dongle to EV3 brick
2. connect EV3 to MacBook via USB cable. THIS IS IMPORTANT.
3. In EV3 software go to Tools – Wireless Setup
4. Select your WiFi Base station when it appears in the list
5. Select Connect
(note that on the EV3 you can see that the WiFi option has now been selected too automatically)
6. Unplug USB cable and the WiFi connection will become your primary connection to EV3 and MacBook; you can see the WiFi symbol in bottom right pane of EV3 software.
This is not so intuitive as you must also repeat this procedure (remembering to plug in the USB cable again) if you restart your EV3 brick. To be fair to LEGO, the EV3 software has a pop up alert telling you to connect a USB cable if you try to re-establish a WiFi connection once again after starting up EV3 brick.
Hi
While trying to establish a TCP/IP connection with EV3.I could see the UDP broadcast with the serial number and the corresponding port number. But I am unable to send the UDP messages back to EV3 to make it accept the TCP/IP connection. Kindly provide steps as to how do I send a UDP message back to the EV3.
Hi
See the test project for the MonoBrick communication library…it shows you how it is done in C#
Anders
In the part above where you say to send a UDP reply you say to send the reply to the port number in the original UDP message that was received and then you say to establish a TCP/IP connection (I assume here you mean a TCP connection since UDP is also a part of the TCP/IP protocol suite) on the same port, but you can’t send a UDP datagram to a TCP port so I am a bit confused. Will the EV3 be listening on the same port number for UDP datagrams as for TCP connections?
Please ask questions in the forum
HI
I only have EDIMAX EW-7811-Un.
It also can Connecte the EV3 to a network?
No – it does not work with the standard firmware only custom firmware like the MonoBrick Firmware
Anders
okay~ thank you~
Btw, Whether this method can remote control ev3 via wifi from PC?
Yes you can
I actully don’t use the USB
Is it possible to use standard WiFi
Not sure I understand the question. Please go to the forum and ask questions…
Anders
There is no built in WIFI in the EV3, but pretty much space inside the housing. Even without unsoldering the usbport from the NETgearStick, the stick will fit inside.
I did that a few times.
And i can send pictures to anyone who is courageous enough to open the brick an do some soldering.
Sounds interesting. Please share!
Can you pls post pictures and comments.
Is there any solution to connecting to a network which has a proxy configuration to it through the EV3?
My father just got me an Ev3 and I was wondering if you knew any wireless adapters you could use for it except for the Netgear N150?